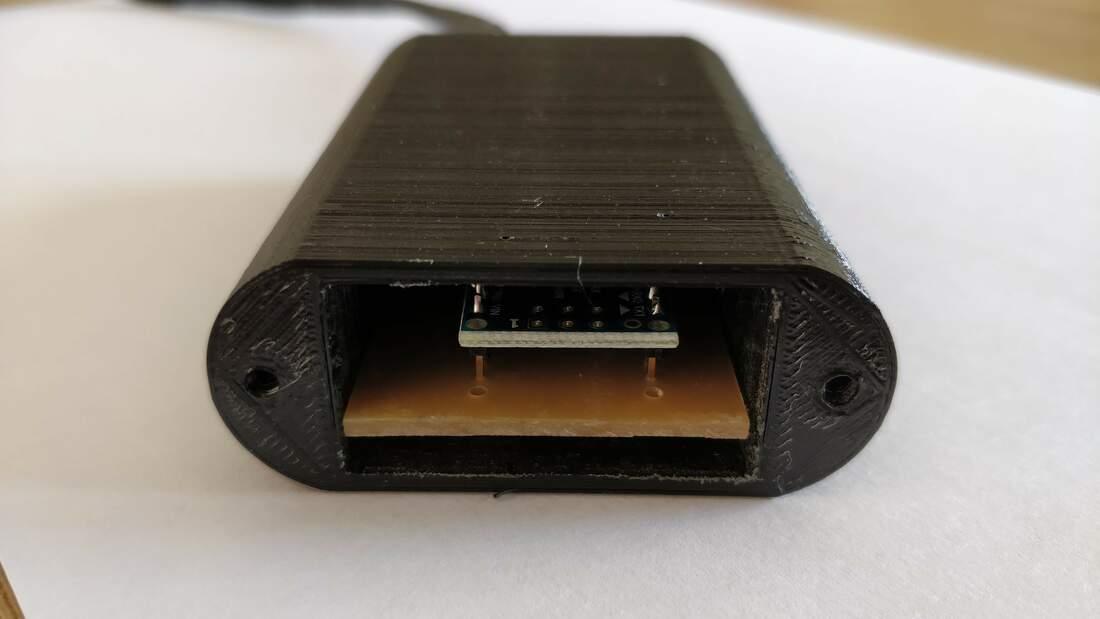
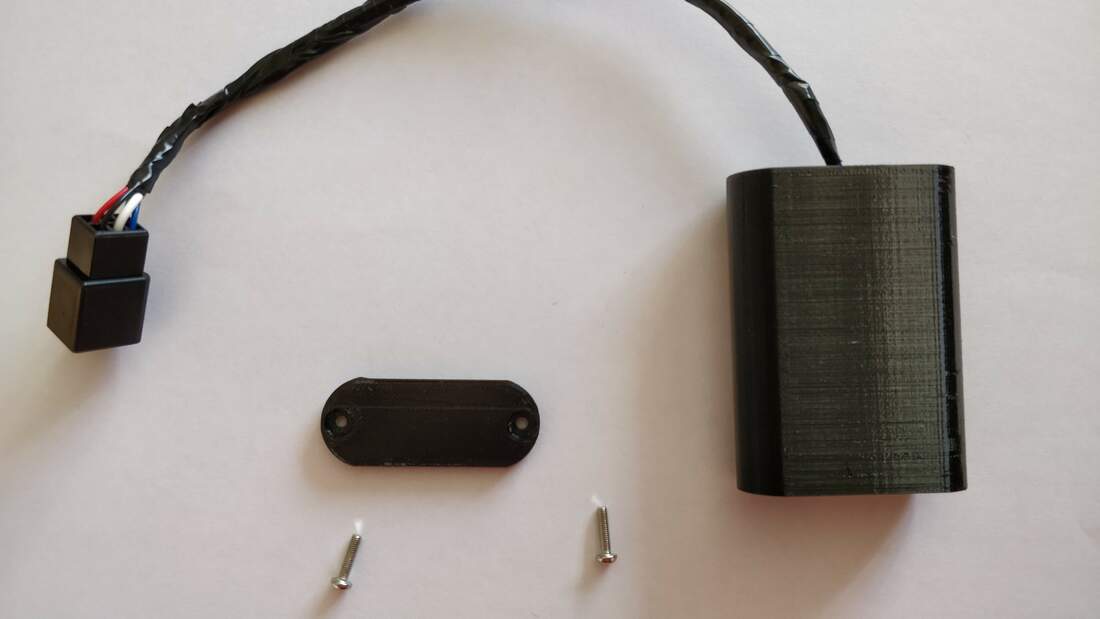
This is my Arduino controlled exup eliminator that will fool the Yamaha R1 ECU into thinking the exup valve is still connected thus preventing error code 17 on appearing on the gauge. How it worksThe exup motor has 5 wires connecting it to the wiring loom; - Black/Red - 12v or 0v to power the exup motor - Black/Green - 12v or 0v to power the exup motor The above two wires switch polarity to change the direction of the exup motor. - Red/White - potentiometer feedback to ECU (wiper) - Blue - 5v from ECU reference voltage for potentiometer - Black/Blue - Ground for potentiometer Upon startup of the ECU the Black/Red wire is energised first to 12v and the ECU expects to see an increase in resistance from the exup potentiometer. The ECU then reverses polarity and energises the Black/Green wire and expects to see a decrease in resistance from the exup potentiometer. The ECU is attempting to turn the exup motor through its full range of movement. Lack of resistance i.e. feedback to the ECU results in error 17 displayed on the clocks. According to the Yamaha service manual the exup will range from 0 - 7,500 Ohms through one full rotation of the valve. My solution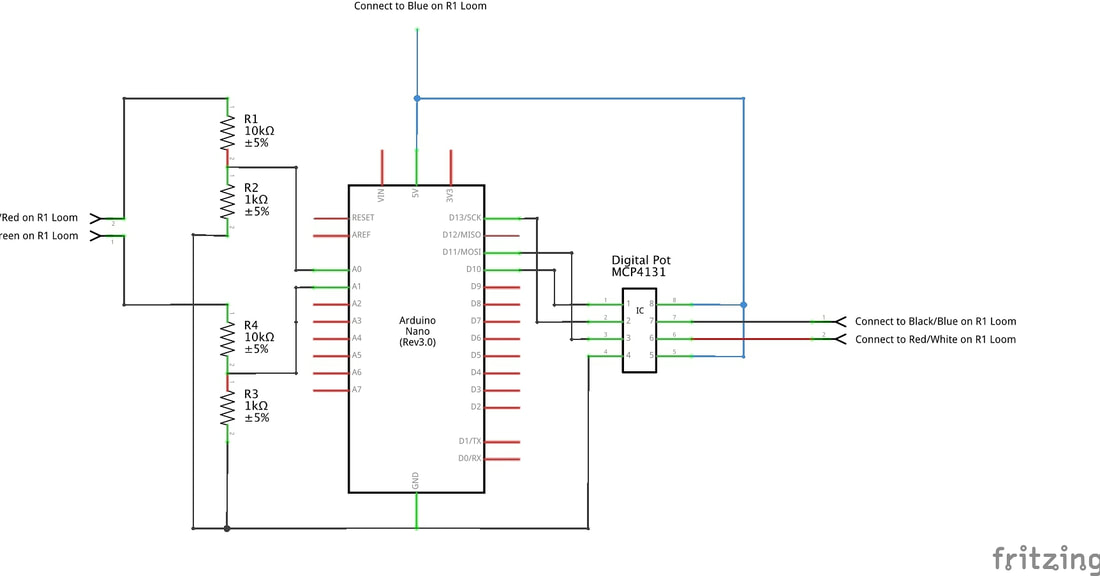 WAt the heart of my solution is an Arduino Nano microcontroller that monitors the state of the two motor wires and alters the resistance of the MCP4131 digital pot as a result. The Arduino analog input pins can't handle voltages over 5v so I have added two voltage dividers to reduce the max voltage to ~1v from a 12v supply voltage. The code on the Arduino is triggered by the presence of a voltage on either of the motor wires. Positive voltage on the Black/Red causes the digital pot to increase in resistance and positive voltage on the Black/Green decreases resistance. Once a voltage is detected a while statement in the code increases or decreases a variable from 0 to 97 which is passed to the digital pot increasing or decreasing the resistance. How I determined the range is detailed below. The whole circuit including the Arduino is powered by 5v from the Yamaha R1 loom on the blue wire. Calculating valuesThe MCP4131 consists of 128 resistors (129 steps). 10,000 Ohms divided by 129 equals 77.52 Ohms per step We know that one revolution of the exup valve is 7,500 Ohms so; 7,500 divided by 77.52 equals 96.7. Arduino's can only accept whole intergers so lets call it 97. So, in order to output 7,500 Ohms of resistance on the digital pot we need to tell the MCP4131 to increase from step 0 through to step 97. Parts required- MCP4131 10k digital potentiometer - 2No. 10k resistors - 2No. 1k resistors - IC holder, 8pin - Arduino Nano v3 - I use clones purchased from eBay. - Various lengths of coloured wire - Protoyping board 70x50mm or use my PCB if you are able to mill your own. - 6 way connector - Project case or 3D print mine Arduino codeYou are free to use my code and adapt as required. Please keep a credit at the top of the code and a link to retromini.co.uk.
Making it look more professionalOnce I was happy with the circuit design and it's function I thought it would be nice if I could package it all up into a PCB. The last time I had created my own PCB was over 20 years ago at school using acid etching. I don't have access to those materials but I do have a CNC mini mill in my garage! I started by downloading and installing Diptrace so that I could create a schematic and then a PCB layout. The schematic is the same as the one pictured towards the top of this post. Getting the layout figured out so everything could be contained on a single layer was a little tricky but I am happy with the results. 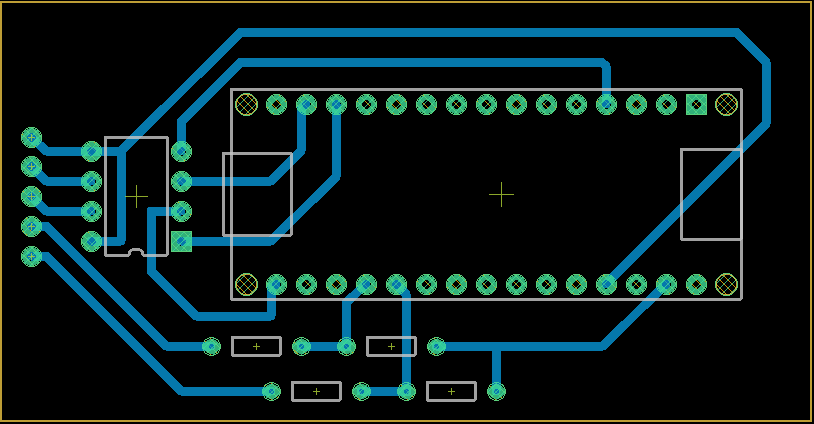 Case 3D Print FileI have designed the case so that my custom PCB slides into two rails and therefore doesn't require any fixings. It is printed in PETG at 1.5mm layer height. No supports required.
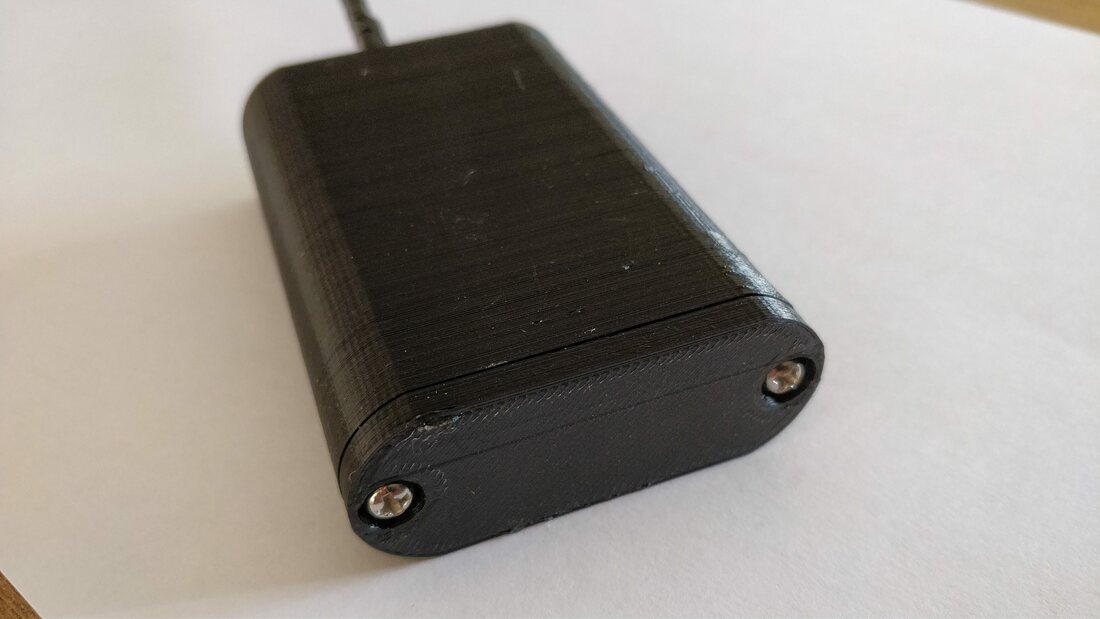
The Finished ITem The unit plugs into the wiring loom and functions exactly as expected. No fault codes on the ECU! Whilst I could have easily purchased a ready made exup eliminator I have found this project to be really challenging and fun to do. I've learnt new skills and saved a few pounds as well.
1 Comment
Antoine
9/10/2019 09:13:21 pm
Hello, Your comment will be posted after it is approved.
Leave a Reply. |
||||||||||||